Laser Cut Box With Finger Joints: SVG and DXF in 5 Minutes
· 1 min read
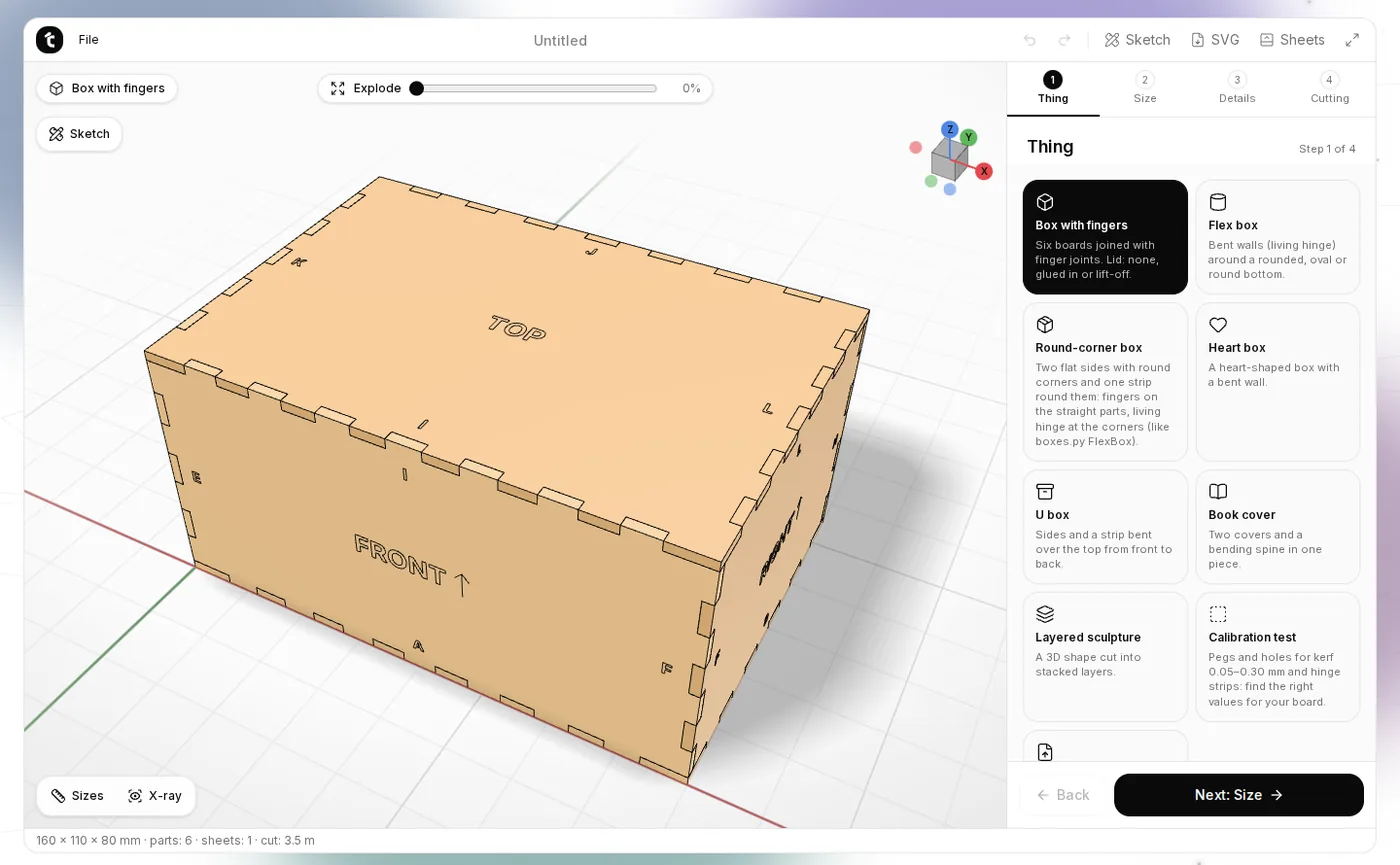
A finger joint box is the classic laser cutting project: six flat plywood parts that fit together without nails. In the Laser Cut Designer you get a template for your size and your laser in five minutes.
Step 1. Choose the product
On the Thing step on the right, choose Box with fingers. The same list has a flex box with a living hinge, a round-corner box, a heart box, a U box, a book cover, a layered sculpture and a calibration test.
Step 2. Set the size
On the Size step, enter width, depth and height, and choose whether the size is outside or inside. Pick the lid: none, glued-in or removable. You can also resize right on the model by dragging the yellow arrows.
Step 3. Parts and engraving
On the Details step you can:
- add dividers in the sketch — they get their own fingers;
- turn on assembly labels: part names and edge letters;
- engrave a ready picture, text or your own image, and drag it on the model.
Step 4. Sheet and laser
On the Cutting step, set the material thickness (measure it with calipers), your laser's kerf and the sheet size. Parts are laid out on sheets automatically. If the check finds a problem, press “Fix”.
Step 5. Download the files
SVG or DXF for LightBurn, RDWorks, LaserGRBL, xTool: red lines cut, black lines engrave. Plus a PDF with the sheets and assembly views.
Tips
- Cut the calibration test first: it shows which kerf gives tight joints without glue.
- Use plywood, not MDF, for living hinges.
- Your project is saved in your browser and never uploaded.