How to Design a Wardrobe Online: Cabinet Designer Tutorial
· 5 min read
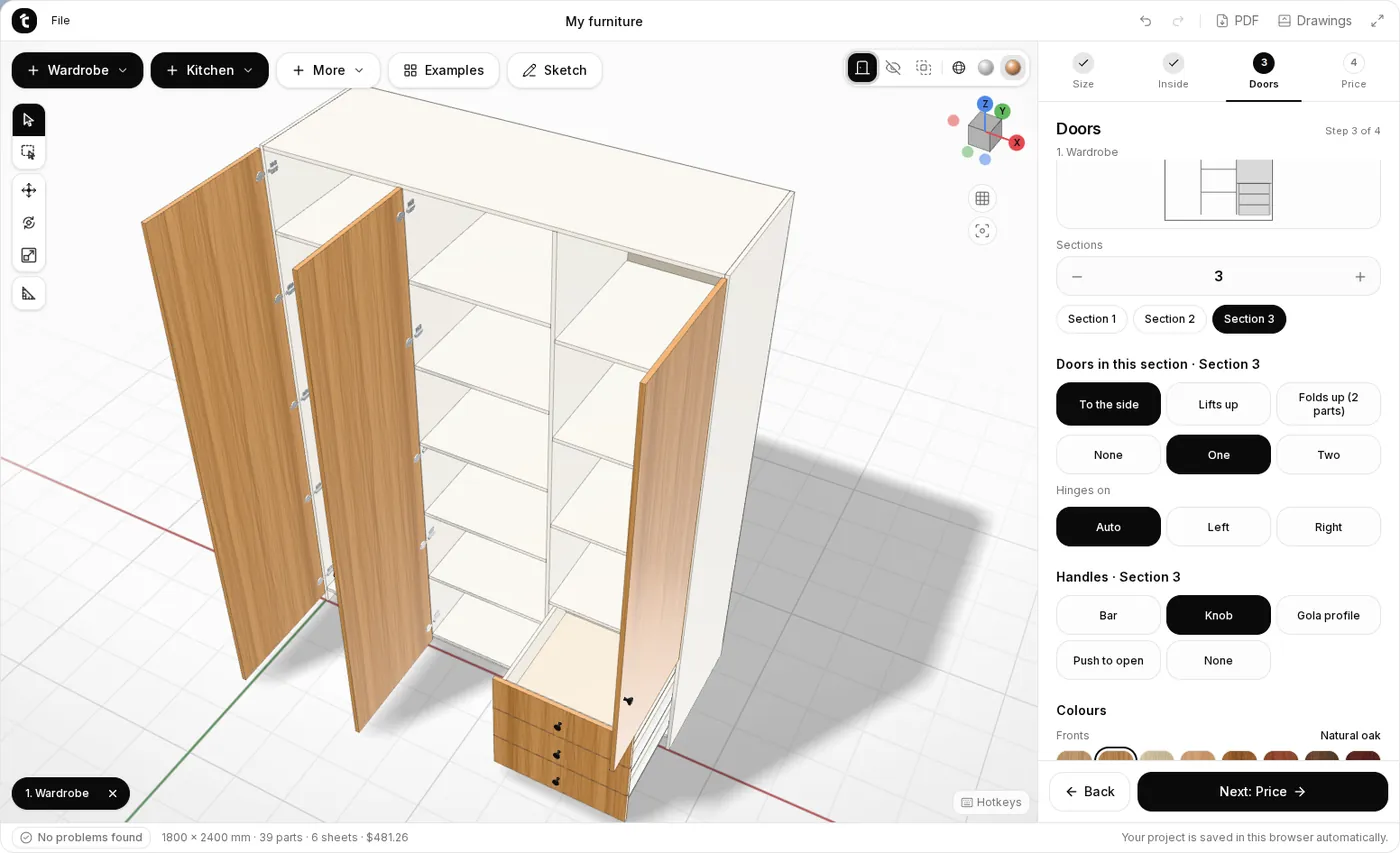
In this tutorial we'll build a hinged-door wardrobe, 1800 × 2400 × 600 mm, in the free Cabinet Designer. It will have three sections inside: one with a hanging rail, one with shelves, and one with shelves and drawers. At the end you'll get a price, drawings and a sheet cutting layout for the workshop.
It takes about 10 minutes. No sign-up: everything runs right in your browser.
Step 0. Open the designer
Open Cabinet Designer. It starts with a ready two-door wardrobe, and we'll turn it into ours.
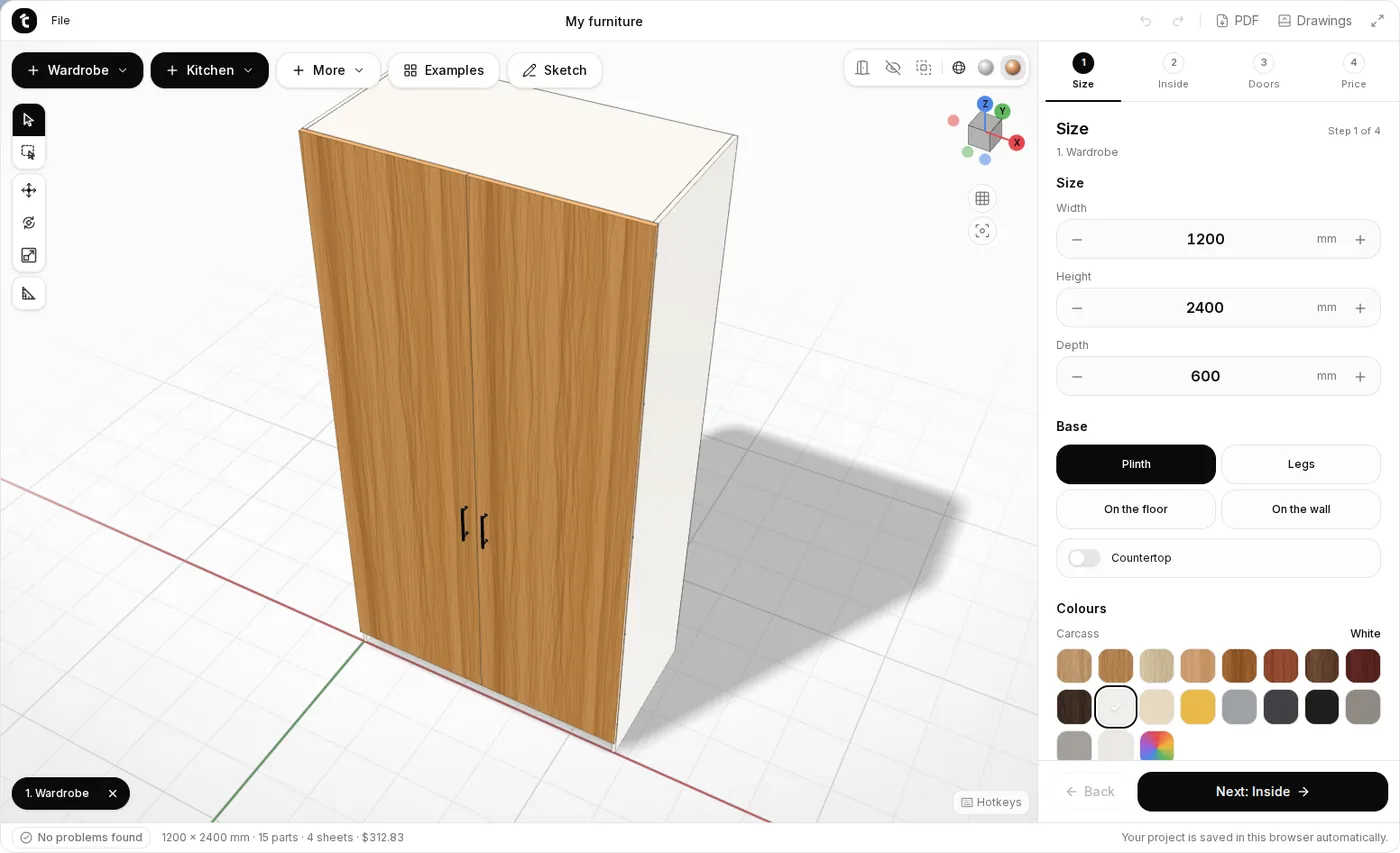
Where things are:
- Top left — “+ Wardrobe”, “+ Kitchen”, “Examples” and “Sketch”. Below them are the tools: select, move, rotate and ruler.
- Centre — the 3D view. Left mouse button rotates, right button pans, the wheel zooms.
- Right — four steps: ① Size, ② Inside, ③ Doors, ④ Price. We'll go through them in order.
- Bottom — the status bar with the size, number of parts and sheets, and the total price.
The project saves itself in your browser, so if you close the tab and come back, everything is still there.
Step 1. Size
On the Size step you set width, height and depth. Make the width 1800: click the number, type the new value and press Enter. You can also press “−” and “+”, or drag the number left and right with the mouse.
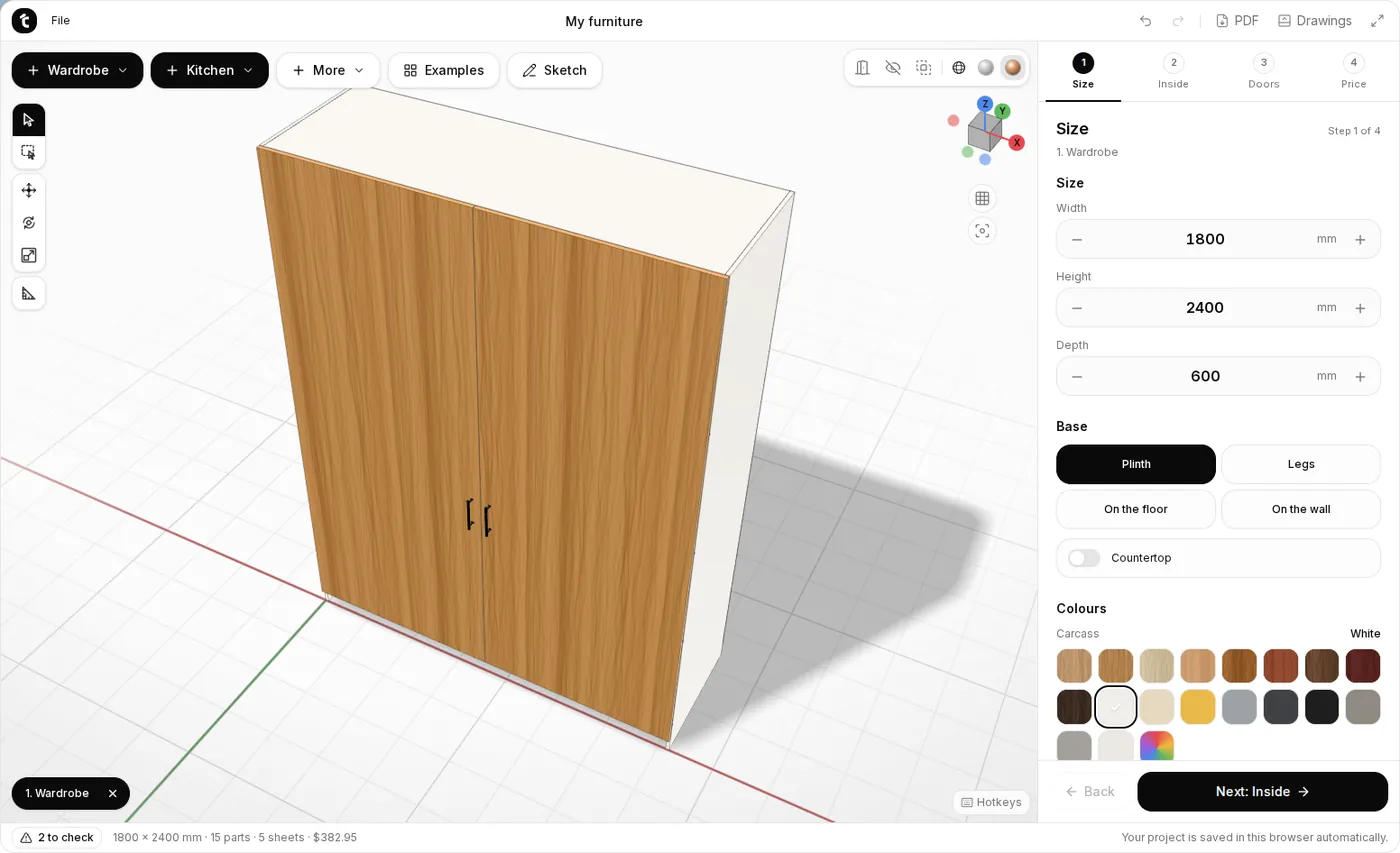
Keep height 2400 and depth 600, the usual size of a clothes wardrobe. Further down you can choose the base (plinth, legs or wall-hung) and the colours of the carcass and fronts: 9 wood decors and plain colours.
Look at the status bar: it now says “2 to check”. The designer noticed that with two sections the shelves are wider than 800 mm and would sag. We'll fix that in the next step.
Step 2. Inside
Press “Next: Inside”.
- Set Sections to 3. The wardrobe splits into three vertical parts, and the small drawing at the top shows which section is selected.
- Section 1 — choose Hanging rail: a rail for hangers with a shelf above it.
- Section 2 — Shelves. Change their number in the “Shelves” field.
- Section 3 — Shelves too. In the Drawers block choose Outside (own front) and set 3 drawers.
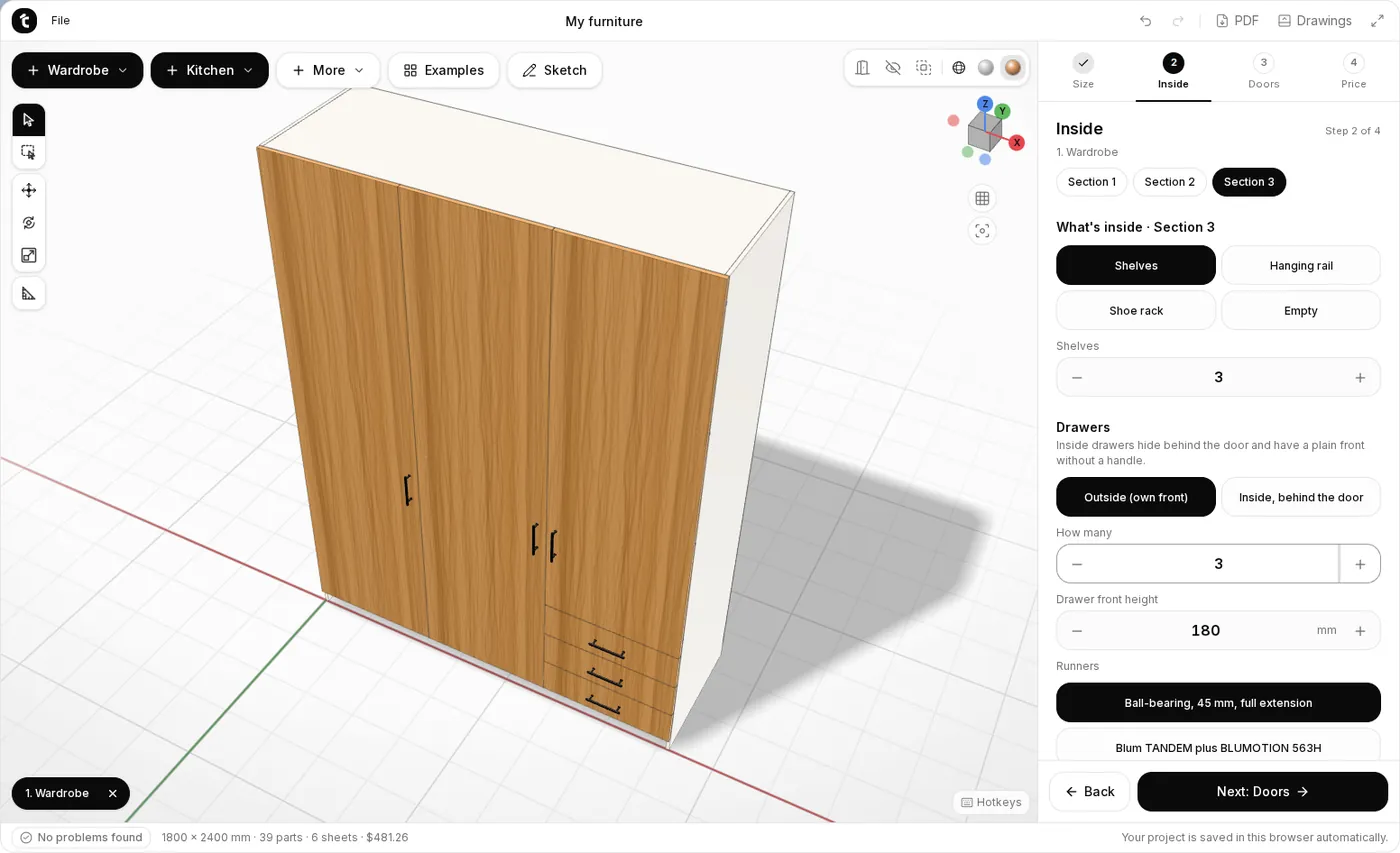
The status bar now says “No problems found”: the shelves are narrower and won't sag. Drawers can also hide behind the door (“Inside, behind the door”), and you can change the front height and pick the runners: plain ball-bearing or Blum TANDEM soft-close.
Step 3. Doors and handles
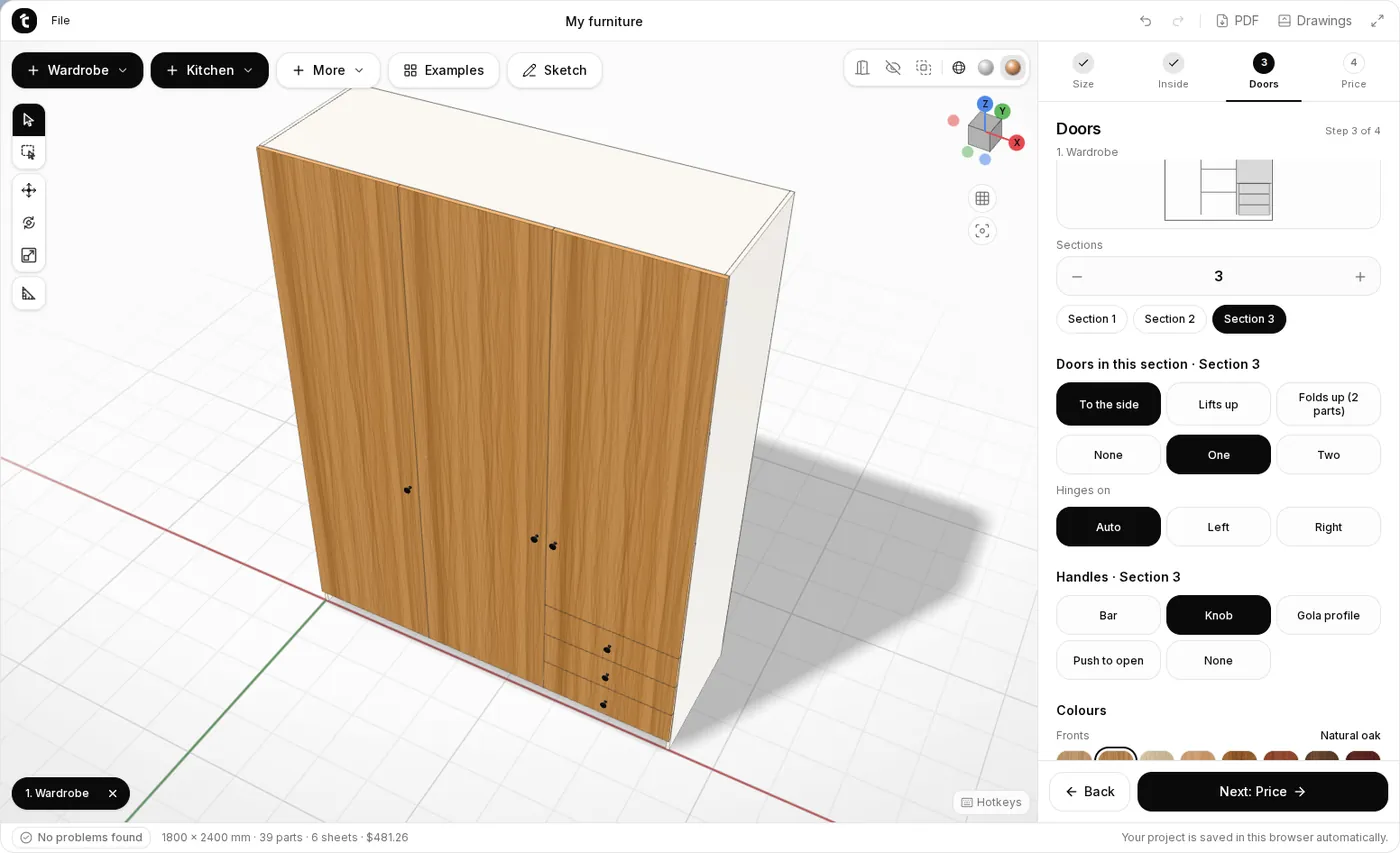
Press “Next: Doors”. For each section you choose:
- how many doors: none, one or two;
- how they open: to the side, lifts up or folds up;
- hinge side: auto, left or right;
- handles: bar, knob, Gola profile, push-to-open or none.
We chose Knob and pressed Same handles everywhere, so every door gets the same handle. Below you can pick the front colour and finish: matte, satin or gloss.
To look inside, press the door icon above the 3D view on the right (“Open doors and drawers”) or the O key. The doors swing open and the drawers slide out one by one. You can also open a single door by clicking it.
Step 4. Price
Press “Next: Price”. At the top is the total: board, edge banding, hardware, cutting at the workshop and your markup.
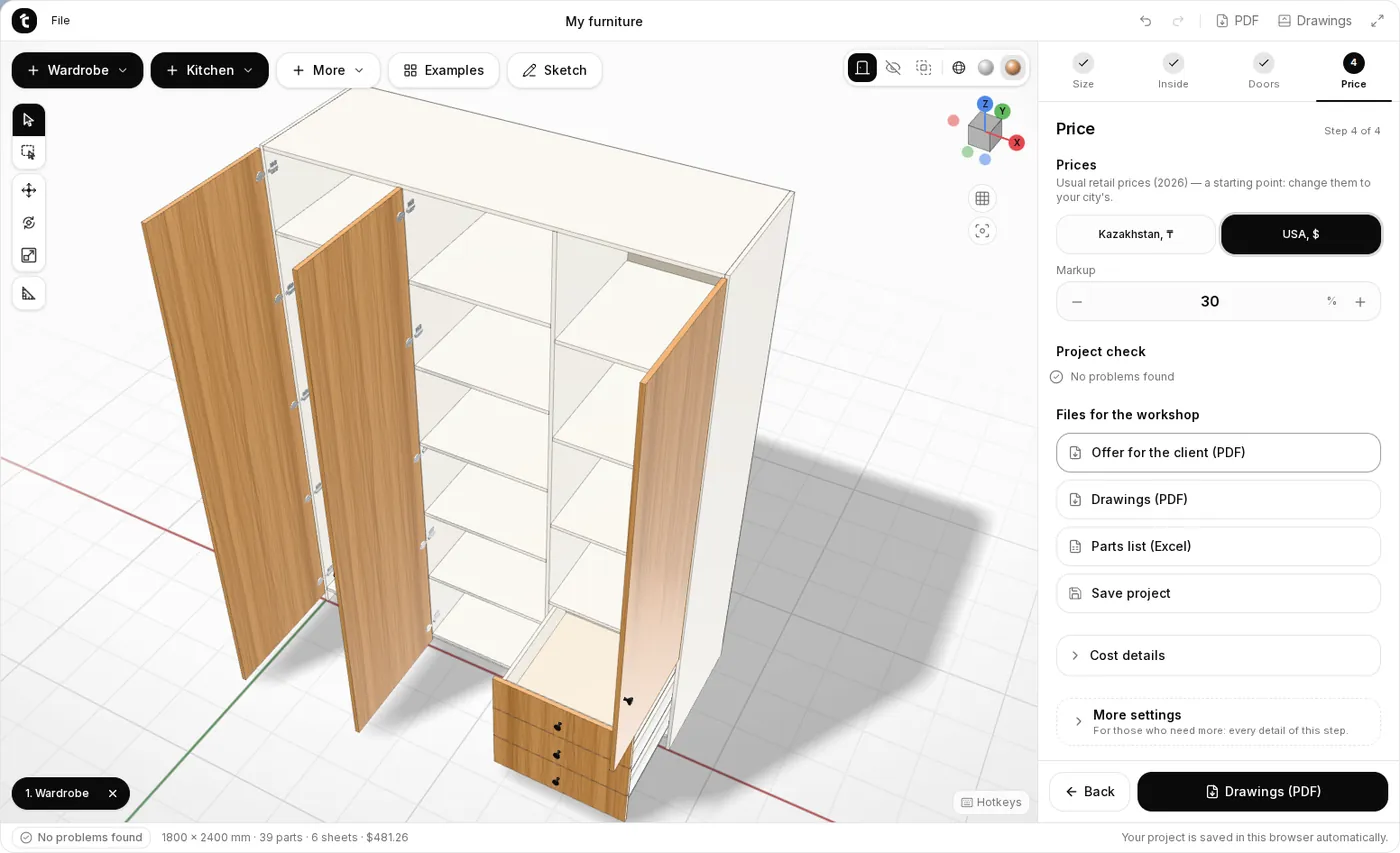
- Country prices — “USA, $” or “Kazakhstan, ₸”.
- Markup — comes with the country prices (30 % for the USA, 50 % for Kazakhstan), and you can change it.
- In More settings you can change every price to match your local shop: board sheet, edge banding, hinges, runners, cutting.
- Cost details shows what the total is made of.
Step 5. Drawings and cutting layout
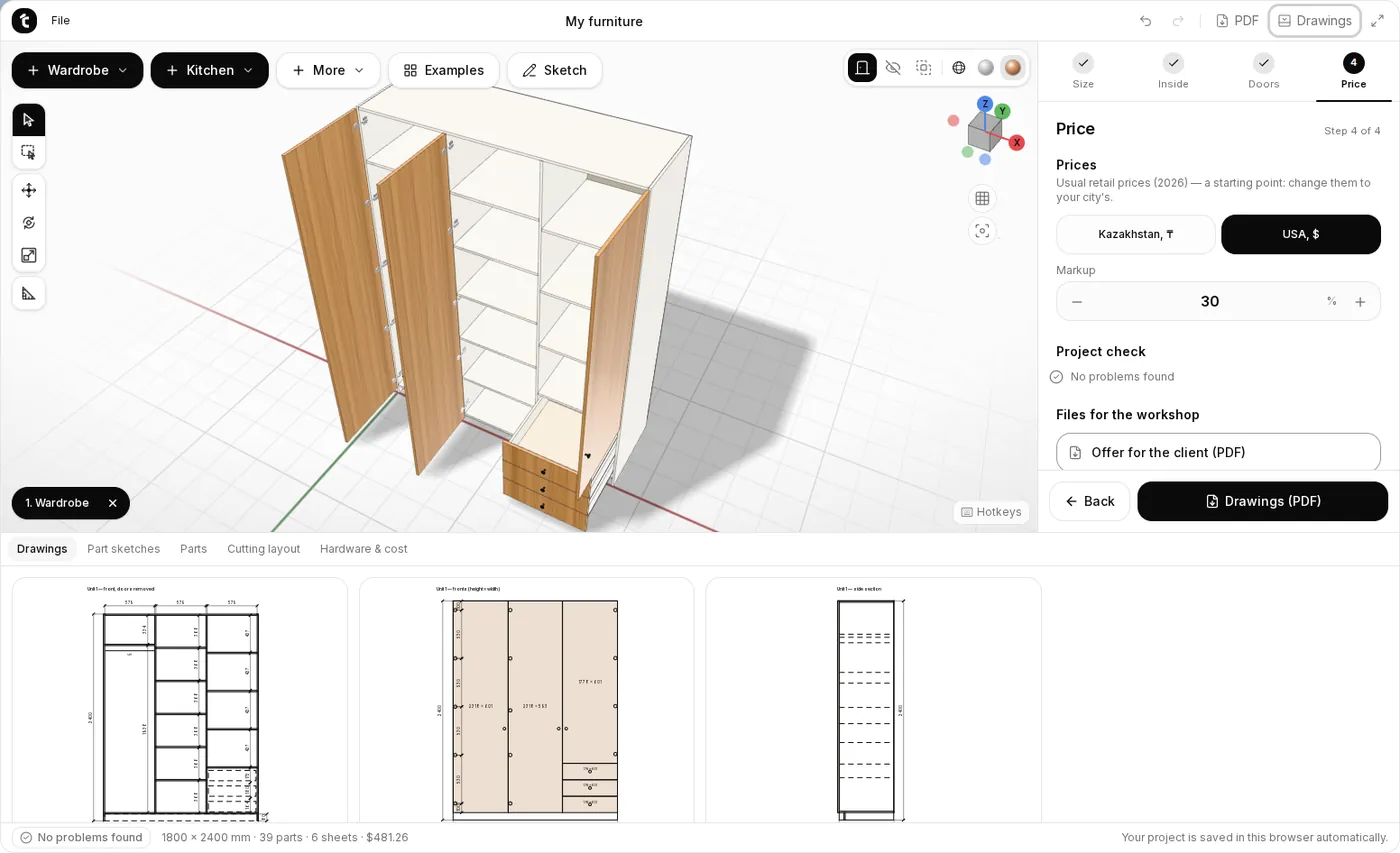
Press Drawings in the designer's top bar. A panel with tabs opens at the bottom:
- Drawings — a front view without doors with all dimensions, the fronts and a side section.
- Part sketches — every part with edge banding per side and holes for hinges, shelf pins and confirmat screws.
- Parts — the full list of parts with sizes.
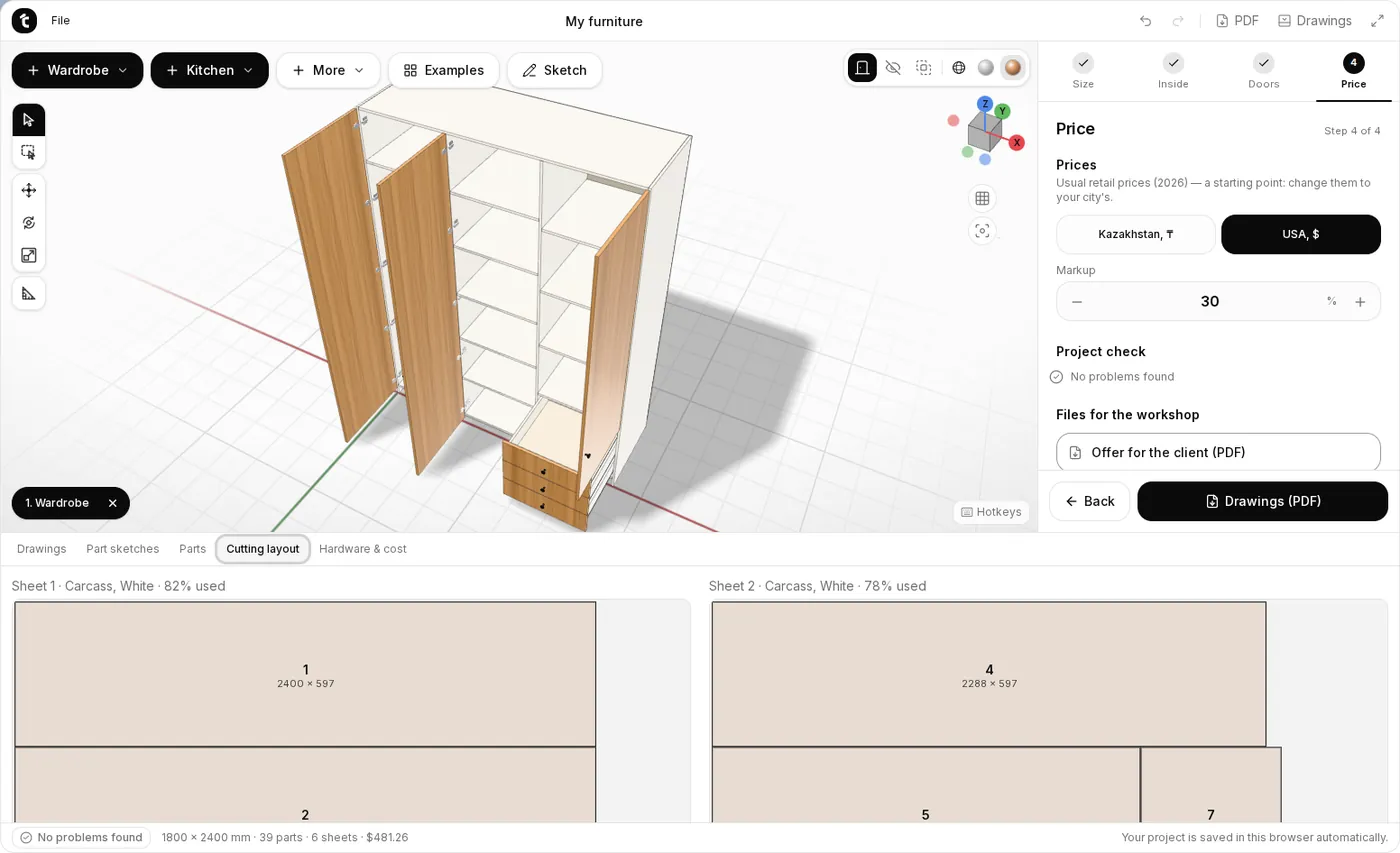
- Cutting layout — how the parts fit on the board sheets.
- Hardware & cost — hinges, runners, screws and handles.
On the Cutting layout tab every part is numbered on its sheet. You can hand this layout to a workshop to have the boards cut.
Step 6. Download the files
On the Price step, under “Files for the workshop”, you'll find:
- Drawings (PDF) — all drawings, the parts list, part sketches and the cutting layout in one file;
- Parts list (Excel) — a table of parts for the workshop;
- Offer for the client (PDF) — a tidy offer with a picture and the price, without your purchase prices;
- Save project — to come back to it later.
The 3D model (GLB, OBJ, STL) is under File → Export.
Handy tips
- Ctrl+Z undoes the last change, Ctrl+Shift+Z redoes it.
- Examples has ready wardrobes, kitchens, hallways and TV walls. It's easiest to start from something similar.
- Sketch lets you draw shelves, dividers and doors with the mouse on a flat front view.
- You can move and rotate the wardrobe and put other units next to it, to build a whole wall unit or a kitchen.
- Everything is calculated in your browser, and your project is never uploaded.
That's it! Now build your own wardrobe in Cabinet Designer.